Followers

Showing posts with label piano bench. Show all posts

Thursday, February 22, 2018

Mistakes on the Bench

I began work on the bench.

 I had the legs glued up and started to do the foot and the upper bracket.  I drilled the holes and drove in the dowels and discovered that I had the top bracket upside down.  I had to take it apart and fortunately   the glue had not set. I pounded on them and it came apart.
Had a lot of trouble with this bench leg.  I glued on thin piece of wood to it would not rock.  The earlier one that I did was to thin.  I did another one that was thicker.  Works good.
A broccoli  plant that is beginning to make a head.  It may be ready in two more weeks.

Red beets are doing very well.  The should be ready to harvest in two more weeks
I pulled red beets from bed one, boiled them for supper.  So good..
Pole beans on bed one.  The will climb the strings.
Robert Transplanted lettuce Saturday.  I transplanted Peaches and Cream sweet corn.  I put one between each lettuce plants.  The lettuce will be harvested long before the corn gets tall.
Our good neighbor with his four wheeler pushed the snow out of our drive way.
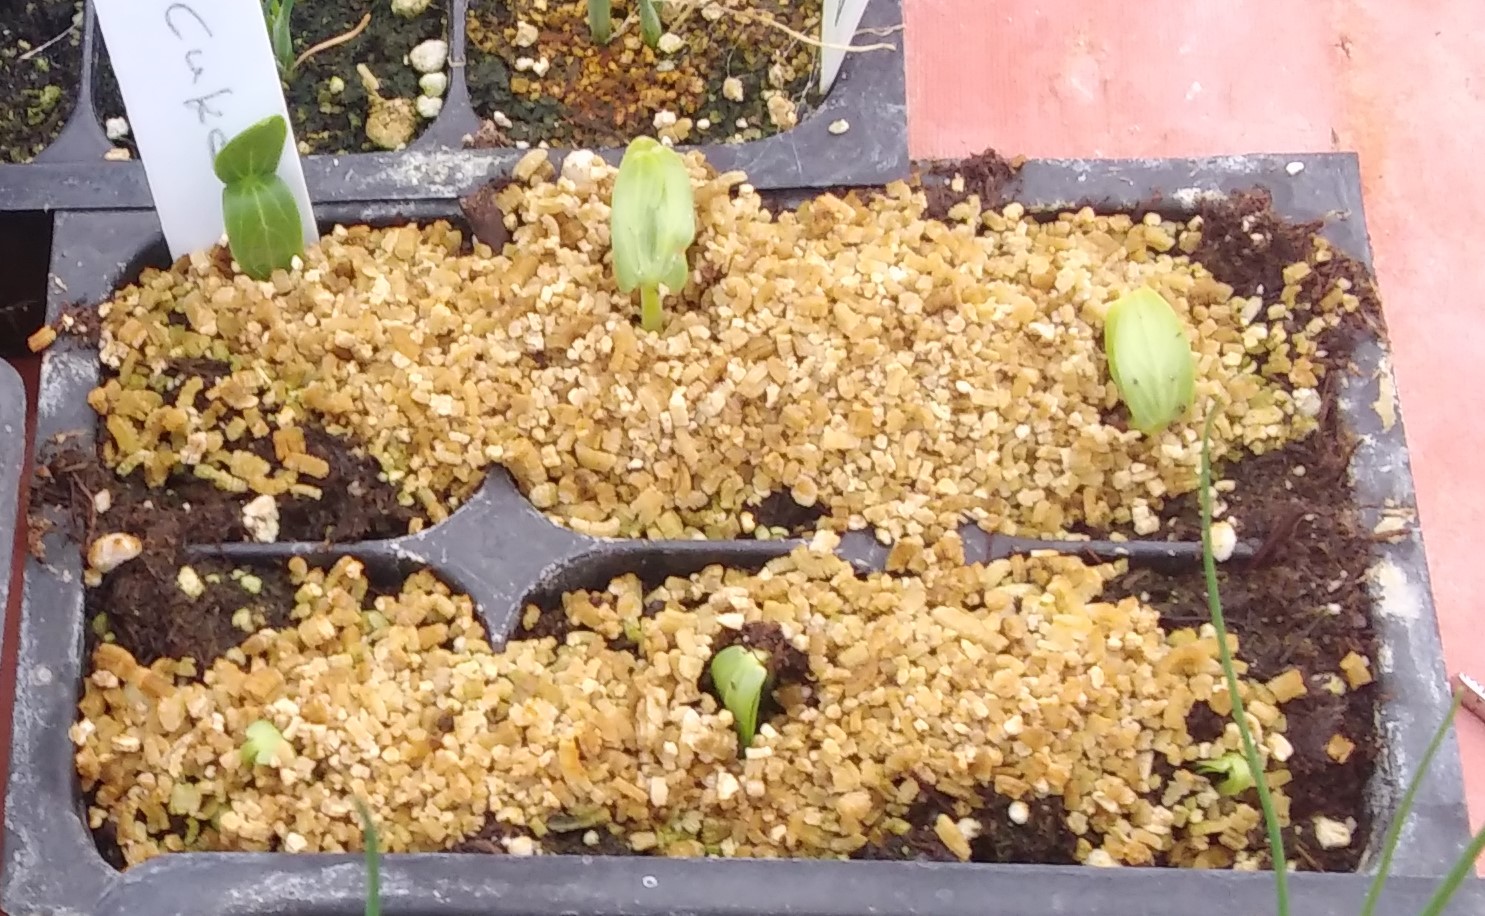
 Burpless cucumbers that are coming up.  One seed in each cell.  All have germinated.
A slug trap using beer.  No slugs, but there are a lot of tiny things that look like a bug.

Paul and Marilyn from Tooele stopped by this afternoon.  We haven't seen them for quite awhile and we had a good visit.


Comments and questions are welcome.

Wednesday, February 21, 2018

Bench Work / Frozen Pipe


 A couple of days ago I posted on Face Book a container filled with beer and the slugs that were attracted by the beer.  A person on Face Book wanted to know what beer we used.  I posted the above photo.
Carol put this puzzle together today.  It is an image of what was done years ago with what we are doing today.
 Our cat, Tiger, sitting in the sun on top of our barbeque set.  It is covered with a blue tarp to keep it dry.
I made a hole through the tenon to hold the stretcher to the legs.  I made the hole for a pin. The holes were not hardly big enough and deep enough to make a tight fitting wedge.  I used a jigsaw to make the holes wide and deep enough.   The leg were too wide and covered the lag screw hole  a little.  I ripped both sides of the legs to make them more narrow.  I then softened the edges again,  New cutting required more staining.

I used lag screws to hold the upper bracket to the underside of the bench top.  I drilled a small hole through the bracket and then used a 3/4 inch spade bit two counter sink about 3/4 inch deep and make a small piolet hole. the lag screw and washer goes through the hole and drove into the bench. 
The above picture shows it from a different angle.
Next I glued the bracket and the foot together.  I also used dowels on the lower bracket and leg.  That was hard to keep everything lined up.  I gave up on the other leg.  I glued them together and clamped it tight on one side and on the other side.  Tomorrow I will use the dowels.
A little after five I walked to house two to do some watering.  The fertilizer injector was working a hundred mile per hour.  I forgot to turn off the injector and the fertilizer tank was nearly empty.  I could hear water running.  I walked to house six.  There was water running down the path and into house five.  I had to go back to house two to shut of the water.

The pipe broke just below the  hose bib.  I walked back to the garage to get cement, primer, and a saw.  Laying on the ground were a few parts I needed.  I found another hose bib.  I cut the broken piece off; there was enough pipe to glue all the parts together. I left a little water running.  It all worked out.

If I had not gone out, the water would have run all night and the pipe that waters the chicken would have frozen and then I would of had a mess to deal with in the morning.


Comments and questions are welcome.


Friday, February 16, 2018

Re-building

It has been a pretty busy day.  I printed a picture of Carol's grandfather, father, uncle and grandmother.  The print queue had three pictures waiting.  Finally I was able clear the queue and print the picture.
The brackets that I made a couple of days ago were too short.  This morning I made some new ones.  I took several short cuts this time.  Instead of cutting them to length, ripping them to width and depth, I cut them to length and glued the three pieces of twelve inch 2x4's and then glued them together.  I clamped the together with pipe clamps underneath.  I then added two more clamps on top and waited until after lunch to finish cutting them to size.
There was still not time for lunch.  In greenhouse two I planted one six pack with Burpless Cucumbers.  One seed in each cell.  I put them a little tub of water.  The water soaked up and wetted all the seeds.
This tomato plant which I dug up last fall has been growing in house two since then. It three main branches.  I cut one off and staked the other two with bamboo stakes and tomato clips.  The stakes are four feet tall.
There were three tomatoes at the bottom.  Two were ripe and one, the smallest one, was green. I cut the cluster of and that is when I saw the green one.  The largest tomato fell from the stem the result of a small bump.  It looks like it will be a excellent salad tomato because of the easy picking.  Might be able to shake the plant and ripe tomatoes will fall off into large baskets.  They are about 2 1/2 inches long.  The Juliet tomato has the same picking characteristics.

I made a salad for lunch using the two small tomatoes, beet greens and some golden chard.  I other things in the salad are:  small sausage, peas from the freezer, raisons, cheese, and sunflower seeds.
Weeds have been a problem in the greenhouse as well as in the garden.  The weed above is a grassy weed that the next generation of plants will start in a month.
The underside of the bench top had a slight convex  that caused the top bracket to rock. The top was two wide to go through my twelve inch thickness plainer.  The first bench I made was twelve inch wide.  I ripped about one inch off the side.  I then run it through the thickness plainer un-numbered times until the convex surface was changed to straight.
I finished the two brackets.  Trimmed to the right size, softened the all the edges except the bottom edges.  It took me a long time to make a jig two get the holes in the right location and bet the right size  of bit.  I will use lag screws to attach the bracket to the bench.  In doing it this way I can take the bench apart for shipping, or I should say that I can put it in the trunk of the car.  


Comments and questions are welcome.


Wednesday, February 14, 2018

Most of the Day with the Piano Bench

Started again on the piano bench.
Above are the two legs, but they are not wide enough.
I glued on another small strip to each leg to make them wider. The brown on the left side is the strip that I added. 
The piano bench that I stained last week is a little bit warped.  With a small hand plane I planed across the grain so the two legs would fit without rocking.  The white area is where I planed it.
The close up shows the underside of the bench with the plane at the far edge.  I drew a pair of parallel lines with the black marker.  I then planed between the lines.
I had a lot of problems with the trestle.  The tenons were badly shaped.  They were so bad that I was going to make a new trestle.  I figured out a way to repair it.  I would make the tenons smaller.
I cut the two legs in half following the grain.  Then I nibbles away a half mortise one each half of the leg.  It took a long time to get them close to being right. I trimmed the mortise the checked for a tenon fit; then I would do it again.  There was not a seamless or tight fit.  If I had a band saw, I could do a better job and do it faster.  With the doweling jig  I was able to glue the two halves back together.
 Here, I did a dry fit with all of the parts.  However, the bench is upside down.
I sanded all of the parts and then stained them.  I used a sponge brush to apply the stain which I had in a small ice cream container.  The finished mortise is plainly visible.


Questions and comments are welcome.

Friday, February 9, 2018

Major Tomato Planting


Yesterday, I filled the cracks and holes with Elmer's Putty.  This morning I sanded both benches, even though, only one bench is shown.  There were numerous cracks and low spots that did not get filled.  I applied more putty.  I may sand it again in the morning.
I am having trouble with the jointer.  It is set for cutting 3/16 of an inch of wood which makes it hard to hold and to keep edge of the wood against the fence.  There is a wheel to turn to move feed table up of down,  When I turn it nothing moves.  I worked on it for over an hour.  I sprayed WD-40 on all parts that should move, but nothing moved.  I loosened some small bolts.  That didn't help.  There is a knob that looks like I could pull it back and that would release the feed table.  Using a wrench, I loosed the knob nut.  I tapped the feed table with a small hammer to jar it loose.  Finally the knob pulled loose and it was fixed.  I then tested it with several boards and was able to make a smooth face or edge on the board.

I decided to do some tomato planting.  The potting soil was so dry and dusty.  I gave it a lot of water and stirred it in.  It takes a couple of hours for the soil to completely soak up the water.  I left it like that and begin to get the tomato seeds.

I gathered up some of the seeds.  I have a computer and a label printer in the little bedroom.  I laid the seed packets in alphabetical order on the bed.  Then I made two labels of the seeds.  One to attach to a plastic stick and the other one to keep in a journal of some type as a record of what I planted and when it was planted.
The above tray is a recycled plug tray in which I got liners for different flowers which I grew to a larger size before selling.  It has seven rows with fifteen cells in each row.   Or look at it another way there are fifteen rows with seven cells in each row.  I planted seven seed of each variety.  I watered it and placed it on the heating mat.  Two of the three heating mats are plugged in.
Here is a close-up of the labels.  Zoom in a little and you can read them.

I need a box to hold my seeds where I can keep them in alphabetical order.  I had a plan, but I really struggle to get it right.  I got all pieces glued up.  I am letting the glue set all night.


Comments and questions are welcome.

Thursday, February 8, 2018

At the Bench, Piano, Again

I began work on the piano bench in the garage.  Yesterday, I bought grit 80 sandpaper for the orbital sander.  This morning I began the sanding of the bench top.  I then trimmed both end off and sanded some more.  
With the router, I eased the edges, the corners, and both ends and both sides.  There were a couple of places that had split a little.  I filled them with glue and clamped it tight.

We then went to the funeral of one of our neighbors.  It was at eleven.  We got home after two and had lunch.
I watered houses two, three, and five.  Then back to the garage.  Yesterday, I bought some Elmer's wood putty.  This afternoon I filled all the cracks and holes of both benches.  I am not to sand it off until it is well dried. 
I had to deposit a check at Wells Fargo bank.  I drove to Fillmore and while there I bought three two outlets and one light switch.   I turned the power off.  I attached the wires.   The black to the brass and the white to the white screws. There was no place for the ground wire.  It took me a while to get the wires bent right and put them under the screw.

Comments and question are welcome.

Tuesday, February 6, 2018

Hanging Totes

Early this afternoon I started work in the garage.
It took me over an hour put up the rail that is left of the blue tote.  I had to make two rails for the green totes several months ago.  Today, I used scrap material I had in the garage and a 2x4x44 inches long from the greenhouse.  I ripped both sides of the 2x4 so both sides were flat and three inches wide so it was a 2x3.  I screwed the long piece of plywood to the bottom and three short pieces to the top in which I would screw it to the bottom of the trusses.

I got a folding ladder to make a scaffold that I could stand on to help me attach the rail to the ceiling.  I screwed the north end into the first rafter.  I then braced the south end to the ceiling with a long furring strip.  I finally finished.  The totes are empty.  I will fill them another day.
I glued these pieces together to make the foot and top rail of the bench.  I tried different ways to remove the dried glue.  I used the belt sander which was not very  successful.  The scraper was a little better.  I ran the big piece through the thickness planer.  That worked.  

Next I ripped it into four pieces.  Two for the foot and two for the top rail.  I ripped them again to have them about 2x2x12 inches.  The four pieces are shown below.
The belt on the belt sander broke.  I put a new belt on it and that also broke.  The picture is above.
I put on new sanding pad on the orbital sander.  This worked much better than the belt sander.
Above is the top rails.  The bench top is not flat but slightly bowed.  I use the planer to remove some of the crown so the rails would fit with out rocking.  I planed only the area below the two rails.


Comments and questions are welcomed. 


Wednesday, January 31, 2018

Cleaning/Organizine

Our garage is a place for junk.  Everything that has a flat surface is covered with tools, junk. Some is really junk, but most are tools and supplies that does not have a decent storage place.  During some of this cleaning I have found tools that I haven't seen for years.
Above is my workbench made out of three 8/4 oak.  There are times that I would like lay something on the bench, but I can't because there is always something there. There is a nice vice on the right end.
I worked on the piano bench this morning. Last night I made seven plugs and glued a plug in each hole.  I used a plane to remove part of the plug sticking up above the bench.  I then sanded them even with the bench top.  I used my router to round off the edges..  Last I sanded the top one more time.  
Here, I cleaned the floor and vacuumed. I did the same in other areas of the garage.
The blade  on the table saw  is very dull.  I cut some yesterday and it got very hot and began to smoke.  Don't want to have hot sawdust start a fire. 
I took the saw blade into the house were the light was better for a closer look at the carbide tips.  Harbor Freight has a saw sharpener for $56. New blades cost $25 to $55.
The blade is removed and more table top to the right is cleaned. 
My miter saw was very dirty.  Changing the angle  was quite difficult.  I removed the back fence which gave me a better view that made it easy to clean. I had to remove four bolts which were metic in size.  It was slow tedious work.  Finally I got them out and cleaned it up.  putting the fence back on was hard.  I had another set of sockets and wrenches in house three.  Using the right size socket made it much easier.
I watered in house two.  Above is a close-up the worm garden.  They have really been active.
I left the north door of house two open.  One or more cats came in and pooped in our raised beds.


Comments and questions are welcome.